We’ve all been there — the party is in full swing, guests are lining up for refills, and you open the freezer to discover nothing but a few sad, half-melted cubes clinging to the bottom of a tray. Running out of ice during a gathering is one of those small hosting failures that can derail the entire drink situation, sending you on a last-minute dash to the convenience store while your guests wait. A sonic countertop ice maker eliminates this problem entirely, giving you an endless supply of that soft, chewable nugget ice people absolutely love — the same kind you find at your favorite drive-through or fast-casual restaurant. These machines produce ice rapidly, often churning out a fresh batch in under twenty minutes, so you’re never left waiting. Better yet, models equipped with a self-cleaning function mean you spend less time on upkeep and more time enjoying your own party. This guide walks you through everything you need to know — from initial setup and strategic ice stockpiling to leveraging that self-cleaning feature — so your next gathering runs smoothly with cold drinks flowing all night long.
Table of Contents
Unlocking the Power of Your Sonic Countertop Ice Maker
Sonic ice — also called nugget ice or pellet ice — is that light, airy, chewable ice you’ve probably encountered at popular restaurant chains and immediately wished you could have at home. Unlike traditional solid cubes that take forever to chill a drink and are tough on your teeth, nugget ice is made by compressing ice flakes into small, porous pieces that absorb the flavor of whatever beverage they’re in. This makes it ideal for cocktails, lemonades, iced coffees, and sodas at gatherings because it chills drinks faster and gives guests that satisfying crunch they associate with premium beverages.
The portability of a countertop ice maker gives you remarkable flexibility during events. You can set it up on a kitchen counter, a patio table, or right next to your drink station — wherever the action is. There’s no permanent installation or water line required for most models; just fill the reservoir, plug it in, and you’re producing ice within minutes. For hosts juggling food prep, music, and conversation, the self-cleaning function is genuinely transformative. Instead of disassembling parts and scrubbing internal components by hand after your event, a single button press circulates water through the system to flush out mineral buildup and residue, keeping your machine hygienic and ready for the next use with almost zero effort on your part.
Getting Started: Setup and First Use
When your ice maker arrives, remove all packaging materials and any protective tape from the exterior and interior components. Check that the ice basket, water reservoir, and drain plug are all in place and undamaged. Before you start thinking about ice production, placement matters more than most people realize. Choose a flat, stable surface with at least six inches of clearance on all sides and behind the unit — the machine generates heat during the compression process, and restricted airflow can reduce efficiency or trigger automatic shutoffs. A kitchen counter away from the stove works well, but if your gathering is outdoors, a shaded patio table near an outlet is equally effective.
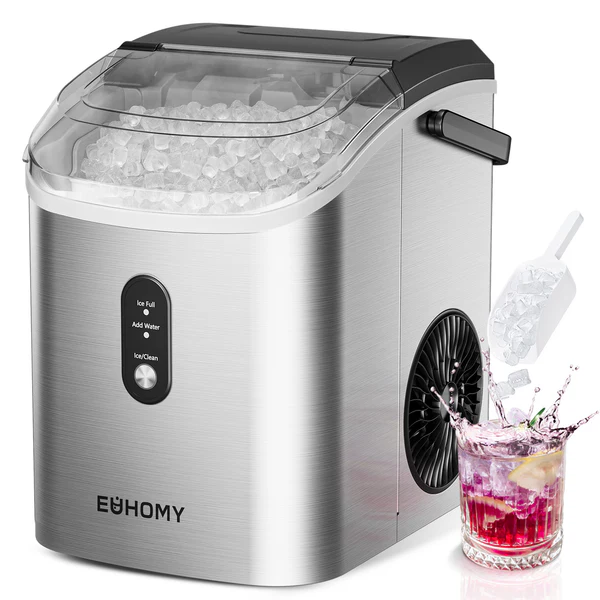
Most countertop sonic ice makers don’t require a direct water line, which makes setup refreshingly simple. Open the top lid, locate the reservoir, and fill it with filtered water up to the marked line. Using filtered water isn’t just about taste — it reduces mineral deposits that can slow production over time. Once filled, plug the unit into a grounded outlet and familiarize yourself with the control panel. You’ll typically find a power button, an ice size selector (small or large nuggets), and the self-cleaning button. Some models, like those from Euhomy, include indicator lights that alert you when the reservoir is low or the ice basket is full. Resist the temptation to immediately start making ice for consumption — your first step should always be running the self-cleaning cycle.
Running the Initial Self-Cleaning Cycle
Every new ice maker carries residues from the manufacturing process — trace oils, dust, and plastic odors that you definitely don’t want ending up in your guests’ drinks. To activate self-cleaning mode, make sure the reservoir is filled with clean water, then press and hold the self-cleaning button (usually for three to five seconds) until the indicator light activates. The machine will circulate water through its internal pathways, flushing the evaporator, auger, and tubing for approximately 30 to 45 minutes. Once the cycle completes, drain the reservoir completely using the bottom drain plug, refill with fresh water, and you’re ready to produce your first batch of party-worthy ice. If you’re setting up the night before your gathering, this is the perfect time to run the cycle — it ensures everything is clean and gives you a head start on stockpiling ice the next morning.
Optimizing Ice Production for Your Gathering
The biggest mistake hosts make is assuming their ice maker can keep up with real-time demand during a party. A typical countertop sonic ice maker produces around one to two pounds of ice per hour, which sounds impressive until you consider that a gathering of fifteen people can burn through that in minutes once cocktail hour kicks off. The key is treating your machine as a production tool in the hours leading up to your event, not just a live dispenser during it. Start your ice maker at least four to six hours before guests arrive and transfer completed batches into storage as they finish. During the party itself, keep the machine running continuously — it will supplement your stockpile and ensure you never hit zero.
Matching your ice size setting to your drink menu makes a noticeable difference in guest satisfaction. Smaller nuggets work beautifully in blended cocktails, smoothies, and spirits-forward drinks because they melt quickly and integrate with the liquid. Larger nuggets hold up better in tall glasses of soda, iced tea, or water where you want sustained chill without rapid dilution. If your gathering features a mix of both, start with larger nuggets for stockpiling (they resist clumping better in storage) and switch to smaller nuggets for live production during the event when guests are making cocktails at a drink station.
Pre-Party Ice Stockpiling Strategy
Plan on roughly one pound of ice per guest for a three-hour gathering — more if it’s a hot day or your menu is drink-heavy. With a machine producing about a pound per hour, a party of twenty guests means you need to start stockpiling at least eight to ten hours in advance, or split the work across two days. As each batch finishes, transfer the ice into gallon-sized freezer bags, press out excess air, and lay them flat in your freezer. This flat-stacking method prevents the nuggets from fusing into a solid block. When you’re ready to use them, simply flex the bag a few times and the pieces separate easily. Alternatively, dump finished batches into a large cooler lined with a clean towel — the towel absorbs melt water and keeps the remaining ice drier and more distinct. If you’re using coolers, add a layer of ice, then a sheet of parchment paper, then another layer; this creates separation that makes scooping easier when you’re serving guests mid-conversation without digging through a frozen mass.
Effortless Maintenance: Leveraging the Self-Cleaning Function
Once your gathering wraps up, the last thing you want is a complicated cleanup routine for your ice maker. The self-cleaning function exists precisely for this moment — it handles the internal hygiene so you only need to manage the exterior. As a general rule, run the self-cleaning cycle after every ten to twenty batches of ice production, or at least once a week if you’re using the machine regularly. After a large party where the machine has been running continuously for hours, trigger a cleaning cycle before you put it away. The process is identical to your initial setup clean: fill the reservoir, press and hold the self-cleaning button, and let the machine do its work for thirty to forty-five minutes while you handle other post-party tasks.
Between deep cleaning cycles, a few quick daily habits keep everything running smoothly. Wipe down the exterior and the ice basket with a damp cloth after each use to prevent sticky residue from spilled drinks or splashed mixers. Empty any remaining water from the reservoir if you won’t be using the machine for several days — standing water encourages mineral scaling and bacterial growth. When you do run the self-cleaning cycle, consider adding a tablespoon of white vinegar or a manufacturer-recommended cleaning solution to the reservoir water for extra descaling power, especially if you live in a hard-water area. This two-tiered approach — routine wipe-downs paired with periodic automated deep cleans — means your machine stays fresh and efficient without ever requiring you to disassemble components or scrub hard-to-reach internal parts by hand.
Troubleshooting Common Issues for Uninterrupted Fun
When ice production slows mid-party, check the water reservoir first — a low water level is the most common culprit and the easiest fix. If the machine seems to be working but producing thin or misshapen nuggets, the room temperature may be too high; relocating the unit to a cooler spot or ensuring adequate ventilation around the sides often resolves this immediately. Unusual grinding or buzzing noises typically indicate ice buildup around the auger mechanism, which you can address by pausing production, letting the machine sit for five minutes, then restarting — this allows any jammed ice to melt free. If you notice an off-taste or cloudy appearance in your ice, standing water in the reservoir has likely developed mineral concentration; drain it completely, refill with fresh filtered water, and run a quick self-cleaning cycle before resuming production. Error codes or flashing lights generally point to a full ice basket or a sensor issue — remove excess ice from the basket and ensure nothing is blocking the infrared sensor near the top of the bin. These quick checks take less than two minutes and keep your drinks flowing without guests ever noticing a hiccup.
Host Every Gathering With Endless Nugget Ice on Demand
A self-cleaning sonic ice maker fundamentally changes the hosting equation — instead of rationing ice or making emergency store runs, you become the host with an unlimited supply of that soft, chewable nugget ice everyone loves. The formula is straightforward: set up your machine on a stable, ventilated surface and run that initial cleaning cycle before producing a single cube. In the hours before your event, stockpile aggressively using freezer bags or layered coolers so you’re never caught short when the crowd arrives. Keep the machine running live during the party to supplement your reserves, and match your nugget size to your drink menu for maximum guest satisfaction. When the last guest leaves, a single button press handles the internal cleanup while you focus on everything else. By leaning into the self-cleaning function regularly — after heavy use and at least weekly during active seasons — you ensure consistent ice quality and machine longevity without tedious manual scrubbing. With these steps in your hosting playbook, ice anxiety becomes a thing of the past, and you’re free to actually enjoy the gatherings you work so hard to create.