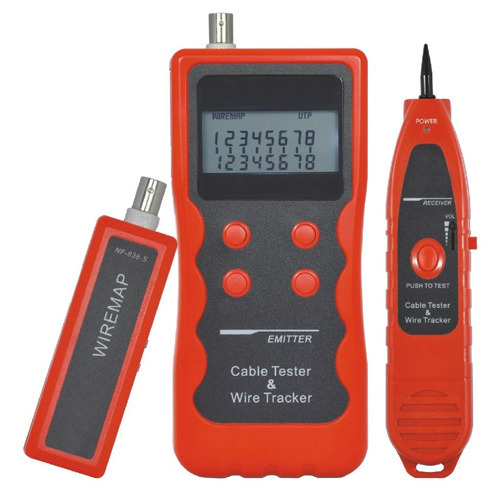
Using a cable tester is an art. As it deals with electricity and cables that have a massive role in our lives, without knowing how to use a cable tester, we can’t cope with such an essential part of our lives.
Although the cable tester suppliers made it easy for everyone to check the cables, connections, and any defects, their manufacturing product still needs attention to be learned to use skillfully. But before going into the discussion of how to use it, first come to understand what a cable tester is and what it contains.
Table of Contents
What is a Cable Tester?
An electronic device that is used to check and verify the electrical connections in a cable is called a cable tester. The basic one is used to check the electrical connection in the line by connecting it to the cable. But if you need to check cable’s signal transmission properties like signal attenuation, resistance, and others, you can use advanced cable testers.
What does it contain?
It is a battery-operated instrument that uses a battery cell. It is small and lightweight so it is easily portable. The user can take it and put it into his bag without any inconvenience. On a superficial surface, this device contain
- To check voltage, it has one or more voltage indicators
- Test points
- Switching or scanning arrangement
- Microcontroller
- Visible light source
- For automatic testing, automated features are also included in some.
- LCD display to show testing result
- Store information for further use
How it works
Connections
Take your cable tester and attach both ends of the cable to the tester you want to test simultaneously. Most cable testers have three parts, i.e., machine, receiver and a distal end.
What to verify?
Cable testers are basically used to verify two things.
- Either intended connections exist or not
- Is there any unintended connections in the cable
Phases
Verification of both points can also be done in two phases.
Opens test
An Opens test is to test whether intended connections exist or not. The cable tester tests a connection by using the following two common ways.
Continuity Test
For this type of test, you need a battery that provides the current and a light bulb that indicates the [presence of current. While testing, the current is supplied by the battery, the current passes down the connection, if the attached bulb lights, it means the current is passing, and it is assumed to be good. Thus, it shows the continuity of the current flow.
Resistance Test
As the battery (Voltage source) offers current that passes down the connection, both need to be measured. Because to calculate the resistance of the connection and compare it to the expected value, we need measured voltage and current. So, after applying the formula V/I, it can calculate resistance.
Shorts test
This shorts test is to check any unintended connections in the cable. Similar to opens, there are two common ways to perform the shorts test.
Low Voltage test
In this test, between two conductors (not connected with each other), a low voltage low power source is connected to measure the amount of current. If the tester indicates no current, it means both the conductors are well isolated.
High Voltage test
The process is similar, but this time it uses a high voltage source with several hundred volts. The reason to use high voltage is to find connections that are nearly shorted quickly, and this is because the higher voltage breaks the insulation of nearly shorted wires.
Results
- When it shows an intended connection is missing, it means it is open.
- When it shows an unintended connection exists, it means a short circuit.
- When it shows, the connection is going to the wrong place. It is called miswired.
So, this is the whole process that a cable tester performs while testing cables; through this, you can understand what you have to do in order to check your cable connections.

