
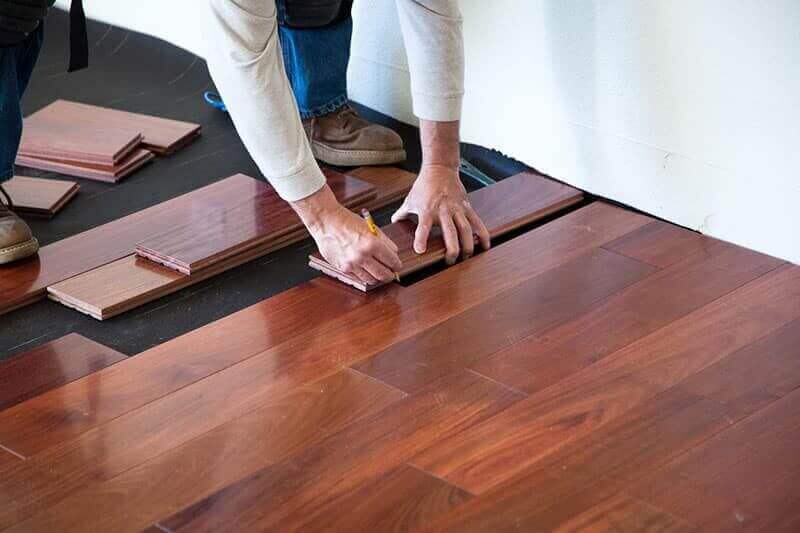
Hardwood floors are a timeless choice for homeowners looking to enhance their spaces with natural beauty and long-lasting durability. Whether you’re remodeling a single room or renovating your entire home, hardwood flooring installation can dramatically change the look and feel of your living space. Known for its elegance, versatility, and value, hardwood floors are a top choice for those who want to bring warmth and charm into their homes.
But like any significant home improvement project, proper planning and understanding are key to achieving the best results. From choosing the right type of wood to executing a flawless installation, this guide will walk you through everything you need to know about hardwood flooring installation.
Table of Contents
Why Choose Hardwood Flooring?
Before diving into the installation process, let’s explore why hardwood flooring continues to be a popular choice for homeowners:
- Aesthetic Appeal: Hardwood floors add a timeless elegance that enhances any room. Available in a wide range of colors, textures, and finishes, you can easily find a style that complements your home décor, whether you prefer classic, rustic, or modern aesthetics.
- Durability and Longevity: One of the major selling points of hardwood flooring is its durability. When maintained properly, hardwood floors can last for decades—sometimes even centuries. The natural wood can withstand heavy foot traffic, and its resilience makes it suitable for any area of the home, including kitchens and hallways.
- Increased Home Value: Installing hardwood floors is a great way to increase the resale value of your home. Potential buyers often view hardwood floors as an attractive feature and are willing to pay a premium for them.
- Easy Maintenance: Hardwood floors are relatively easy to maintain, requiring only occasional sweeping and mopping. In addition, scratches and imperfections can be sanded out, making it easy to restore the beauty of your floor over time.
- Eco-Friendly: Natural hardwood is a renewable resource, and many hardwood floors are now available from sustainably managed forests. Furthermore, hardwood can be refinished several times, making it an environmentally friendly option compared to other flooring types.
Planning for Hardwood Flooring Installation
A successful hardwood flooring installation begins with thorough planning. Here are a few things to consider before you start:
1. Choose the Right Wood Type
Hardwood flooring comes in various types, and the wood you choose can impact both the look and durability of your floor. Common hardwoods include:
- Oak: Known for its strength and resilience, oak is a popular choice in many homes. It’s available in both red and white varieties and features a pronounced grain pattern.
- Maple: This wood has a subtle grain pattern and is often used for modern, minimalist styles. Maple is also durable and resistant to abrasion.
- Cherry: Cherry wood offers a rich, reddish hue that darkens over time, adding warmth to your space. It is slightly softer than oak but still a great option for residential areas.
- Hickory: A durable and sturdy wood, hickory has a distinctive look with a varied grain pattern. It’s often used for rustic or country-style décor.
- Walnut: Known for its rich, dark color, walnut adds luxury to any room. It’s a softer wood but still durable enough for home use.
The type of wood you select will influence the appearance, texture, and cost of your floor, so consider the aesthetic and functional needs of your space.
2. Choose Between Solid and Engineered Hardwood
There are two primary types of hardwood flooring: solid hardwood and engineered hardwood.
- Solid Hardwood: Made from a single piece of wood, solid hardwood is the traditional choice for many homeowners. It’s durable, can be sanded and refinished multiple times, and offers the classic look of natural wood. However, it is more susceptible to changes in humidity and temperature, so it may not be ideal for basements or areas with high moisture levels.
- Engineered Hardwood: Engineered hardwood consists of several layers of wood, with the top layer being a veneer of real hardwood. This construction makes engineered hardwood more stable in varying climates, and it’s often a better option for areas like basements or below-grade levels. While it can be more resistant to moisture and temperature changes, it cannot be refinished as many times as solid hardwood.
3. Prepare the Subfloor
Before installing hardwood flooring, it’s important to ensure that your subfloor is clean, dry, and level. Any imperfections or moisture can affect the installation and lead to long-term problems. Check for any uneven areas and use leveling compounds if needed to create a flat surface. If you have a concrete subfloor, you may need to install a moisture barrier to prevent water from seeping into the hardwood.
4. Acclimate the Wood
Hardwood flooring naturally expands and contracts with changes in humidity, so it’s essential to acclimate the wood before installation. Store the planks in the room where they will be installed for at least 48 hours prior to beginning the project. This allows the wood to adjust to the temperature and humidity levels of the room, minimizing the risk of warping or buckling once installed.
Installing Hardwood Flooring: Step-by-Step Process
Once you’ve selected your materials and prepared the space, it’s time to begin the hardwood flooring installation process. While it’s possible to install hardwood flooring yourself, many people opt to hire professionals for the job to ensure a flawless finish. If you’re doing it yourself, follow these steps:
Step 1: Lay the Underlayment
If you’re installing engineered hardwood, you may need to add an underlayment to provide a buffer between the subfloor and the wood. Underlayment helps with sound absorption, moisture protection, and can even help level out slight imperfections in the subfloor.
Step 2: Plan the Layout
Begin by planning the layout of your hardwood planks. You may want to start in the center of the room and work your way out to the walls to ensure a symmetrical look. Mark your starting point, and make sure the planks are aligned with the room’s longest walls to create a visually pleasing result.
Step 3: Start Installing the Planks
Start by laying the first row of planks, leaving a small gap (usually around ¼ inch) between the planks and the wall. This gap will allow for the natural expansion of the wood. Depending on the type of hardwood you’ve chosen, you may need to nail, staple, or glue the planks down. For click-lock engineered hardwood, the planks simply snap into place without the need for nails or glue.
Continue installing the remaining rows, ensuring that the seams of each row are staggered to create a more natural, seamless look. Use a tapping block to ensure the planks fit tightly together.
Step 4: Cut Planks to Fit
When you reach the walls or other obstacles like vents or doorways, you’ll need to cut the planks to fit. Use a saw or miter saw to trim the boards to the correct length. Always measure carefully before making cuts to avoid mistakes.
Step 5: Install the Last Row
The final row may require more precise cutting, especially if the walls aren’t perfectly straight. Measure and cut the last row of planks to fit snugly against the wall.
Step 6: Add Trim and Molding
After all the planks are installed, you can finish the project by adding baseboards or quarter-round molding to cover the expansion gaps between the floor and the walls. This trim not only provides a clean, finished look but also helps secure the hardwood flooring in place.
Maintaining Hardwood Floors
Once your hardwood flooring installation is complete, it’s important to maintain it properly to keep it looking great for years to come. Here are some tips for hardwood floor care:
- Regular Cleaning: Sweep or vacuum the floor regularly to remove dust and debris. Use a damp (not wet) mop with a cleaner specifically designed for hardwood floors.
- Protect Against Scratches: Place felt pads under furniture legs to prevent scratching the surface. Avoid dragging heavy furniture across the floor.
- Refinishing: Over time, your hardwood floor may develop scratches or show signs of wear. Sanding and refinishing can restore its beauty and protect the wood from further damage.
Conclusion
A hardwood flooring installation is a substantial investment that can enhance the aesthetic, value, and functionality of your home. Whether you choose solid hardwood or engineered wood, proper preparation and installation are key to ensuring your new floors last for years. By following the steps outlined in this guide and taking the time to care for your floors, you’ll be able to enjoy the natural beauty of hardwood for generations to come.

